Showing posts with label Lettice Knollys. Show all posts

Tuesday, August 18, 2015

Making My Elizabethan Hat, and Other Details

Hello world!

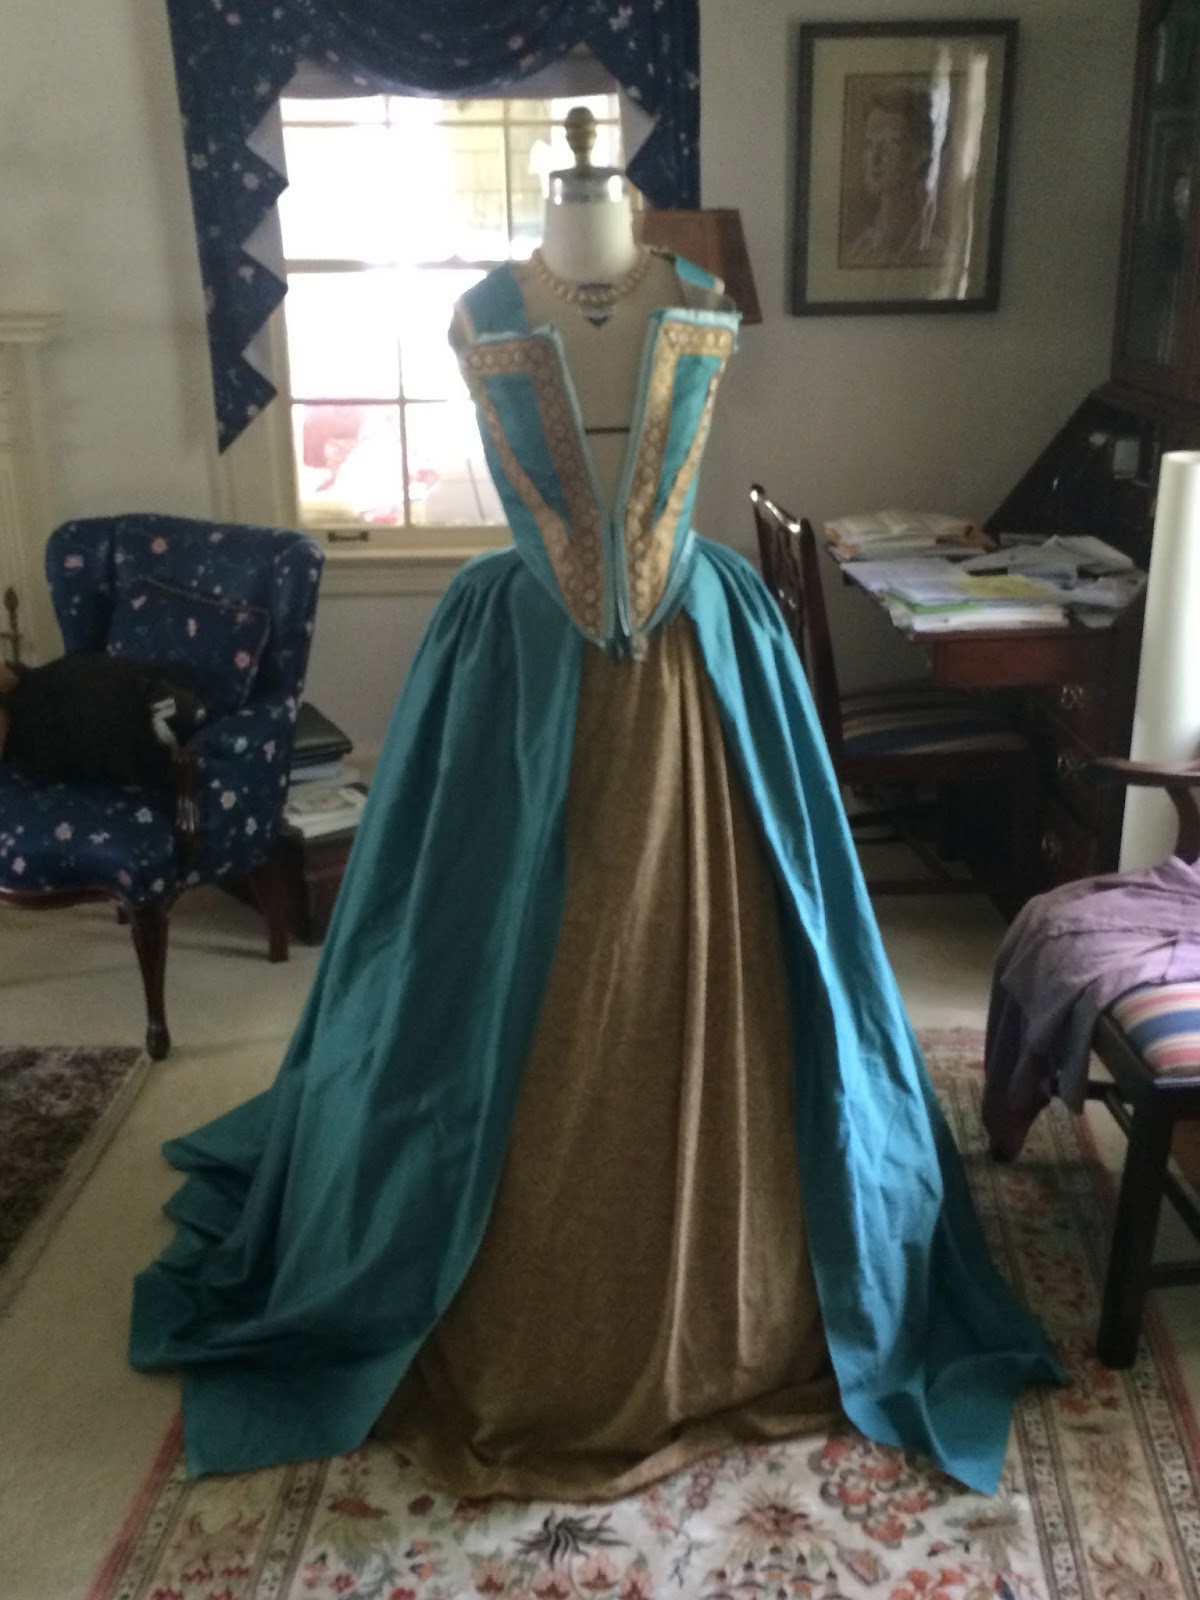
I didn't post much during the end of my project because things got pretty minute and self-explanatory: putting hooks and eyes onto my bodice, trimming my skirt, adding buttons, etc.  the new elements are the shoulder poofs, forepart, sleeves and hat.

The shoulder poofs are crescent-shaped pieces of green silk flat lined with tulle net, then gathered onto a smaller crescent to create a 3 dimensional croissant shape.   I applied these to the shoulder straps with a slip stitch, then strung beads over the top in an offset pattern to mimic spiraling.  The beads are on button thread which is tacked to either side of the shoulder strap.

My sleeves are basic fitted 2-part sleeves of quilted silk that came with white beads at the intersections.  I sewed up the back seam completely but only did 1.5 inches at the top of the front seam, then finished the open edges and sleeve cap with piping.  I sandwiched elastic button loops between the piping and the edge, then lined the sleeves with pale green silk to match my poofs.  They have eyelets along the sleeve cap to lace into my bodice.

Now for the fun part: making a hat!

I started out by tracing a crown-rise that is smaller than my head- the rise is 21 3/4" and my head is 22 3/8".  This ensured that the hat would perch on my head, rather than coming down to my ears.  I added 2" to that shape to create the brim pattern, plus a 1" seam allowance inside the traced circle.  I cut that shape 2x out of heavy-weight craft pellon (which is better for outdoor summer wear than buckram, which wilts with sweat and rain).  I pad-stitched the two layers of pellon together and then added millinery wire to the outside edge with a classic buttonhole stitch.  At this point, my friends and loved ones were calling it my "toilet seat hat." 

Next I cut the same shape, plus 1/2" seam allowance on the outside edge, out of my light green silk, which will cover the top of the brim. 

And I cut the same shape once again (this time without seam allowance) out of gold silk, which will be the underside of my brim.  For optimum wrinkle-free tension, I kept it as a full oval and didn't trim out the inside.   I smoothed the silk over the pellon and pinned it, then sewed just inside the outside edge and 1" inside the ring, securing the gold to the pellon. 

You can see my crown-rise (on the left) and my paper pattern (on the right) here.  Next I added piping, made of bias strips from the gown fabric, to the outer edge of the brim cover. 


Now I stretched the cover over the base, and machine stitched it down on the inside, along the stitch line (the line which will eventually sit against my head.  Trimmed out the extra gold fabric with an X-acto knife, then I smoothed everything out and turned the piping seam allowance under and down, covering all the raw edges. 


Better view of the bottom of the brim, with the piping partially stitched down.  

Once everything was attached, I clipped the seam allowance and creased it up

I cut a support band out of one layer of the same pellon, and stab stitched the brim SA to the band.

For the crown, I cut once circle of silk the same size as the hat brim (without cutting out the center oval, of course), and two of tulle netting.  I zigged those three layers together, then pleated them onto the brim, pinning until it looked right.


Once I liked the pleat arrangement, I stab stitched them down.  

Another view of the hat, ready to be trimmed and decorated

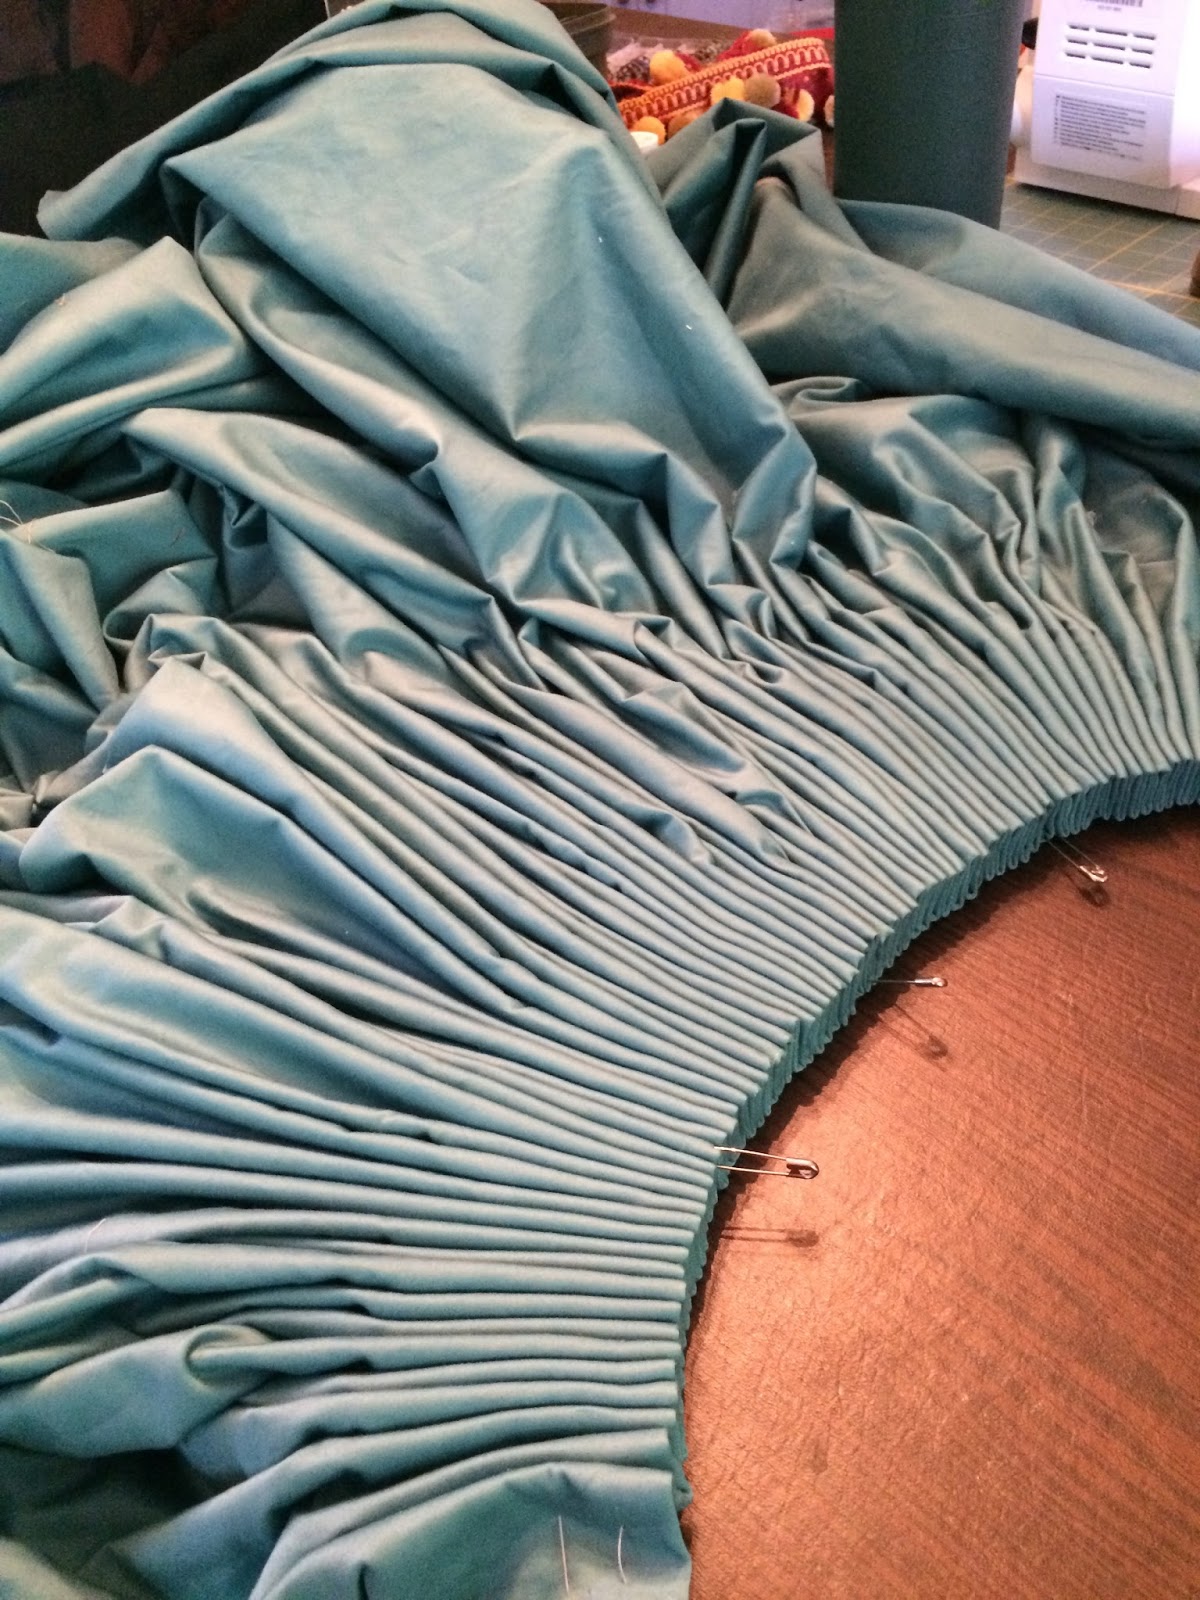
Because I am crazy, I decided it was a good idea to make my own ruching out of a bias strip, left over from making piping for the gown.  

Once the pleats were secure on the ruching, I tacked each down and sewed a pearl bead in the center, to create these little bows. 

This took so much time, but it was worth it!  I was panicking because these steps were on Thursday, and my show opened Saturday morning.  I fitted the band over the hat, tacked it down in 4 places, added a huge antique button, and stuck some feathers in.  Voila!  


Monday, June 22, 2015

Introducing Lettice Knollys

I'm so pleased to announce that this coming summer, I will be playing Mistress Laeticia Knollys (Lettice or Letty to her friends) at the New York Renaissance Faire!  Letty was a fascinating woman: 1st cousin once removed to Queen Elizabeth, she came to court at the beginning of Elizabeth's reign as a Maid of Honour while her father had a seat on the privy council.  Strikingly physically similar to the Tudor queen with a pale complexion and red-gold hair, Lettice was thought to be a possible bastard grand-daughter of Henry VIII with his mistress, Mary Boleyn.  Lettice was known for being quick-witted, fashionable, somewhat morally lax and very flirtatious.  The Faire takes place in 1560, when Lettice was either 16 or 20 years old (historians disagree on her date of birth) and unmarried, living with the other Maids of Honour in attendance on her Majesty.

She became notorious later in life for her rumored scandals and ostentatious lifestyle and was banished from court when she married Robert Dudley, the Earl of Leicester and Elizabeth I's lifetime friend, companion, and rumoured paramour.  Although the two fierce red-headed women had gotten along well in their youths and Lettice had been a "favourite," they never repaired the rift and remained distant long after Dudley's death; Elizabeth once referred to Lettice as a "she-wolf".  By all accounts Dudley adored his wife, and was known to be very devoted to her and treasure her council.

Although Lettice never returned to court, her son Robert Deveraux (Earl of Essex) eventually became a favourite of the aging Queen, though he hardly deserved the honour and was executed for treason after launching a failed coup and attempting to "rescue" her Majesty from the pernicious influence of her councilors and seize the crown.  Lettice outlived all three of her husbands, her two daughters, her sons, and the Queen, eventually dying on Christmas morning, 1634 at the impressive age of either 91 or 95.  In compliance with her wishes, she was buried next to Robert Dudley and they rest together at the Collegiate Church of St. Mary in Warwick near Kenilworth Castle, where they had lived together.

How to play a notoriously stylish and alluring court lady in her younger years?  I'm thinking a big fancy gown is in order.

Cartridge pleats!  Since we all know that Beauty is Pain, I decided to use a historically accurate technique and hand-sew the pleats into my skirt.  This involved very carefully marking my fabric after inserting a layer of baby flannel under the fold, then putting in two rows of running stitches.  That's 24 feet of hand stitching!  

But every moment is worth it when you pull up those gathering threads and see the lovely, rounded, fan-like result.  This is also how Elizabethan ruffs were made.   

I marked the edged, center, and half-way points with safety pins before gathering the pleats to ensure that they would go evenly onto the waistband. 
Here are the pleats pinned to the waistband; each one had to be individually hand-sewn to the band at top and bottom, which took at least 4 hours.  My fingers were very sore from forcing the needle though the baby flannel and tightly-woven cotton sateen.  
My mannequin doesn't wear the bodice particularly well because she lacks the necessary squishy bits.  Although the mannequin is actually smaller than me, the bodice appears too tight to close.  
Everything looks classier with hems.  I love how the cotton looks in low-light; it really brings out the teal / green tones. 

Finally, I put the gown on for the first time! It's still far from complete, but now you can clearly see the overall shape and proportion.

Feeling like a princess!  Or, more accurately, a Countess-to-be.